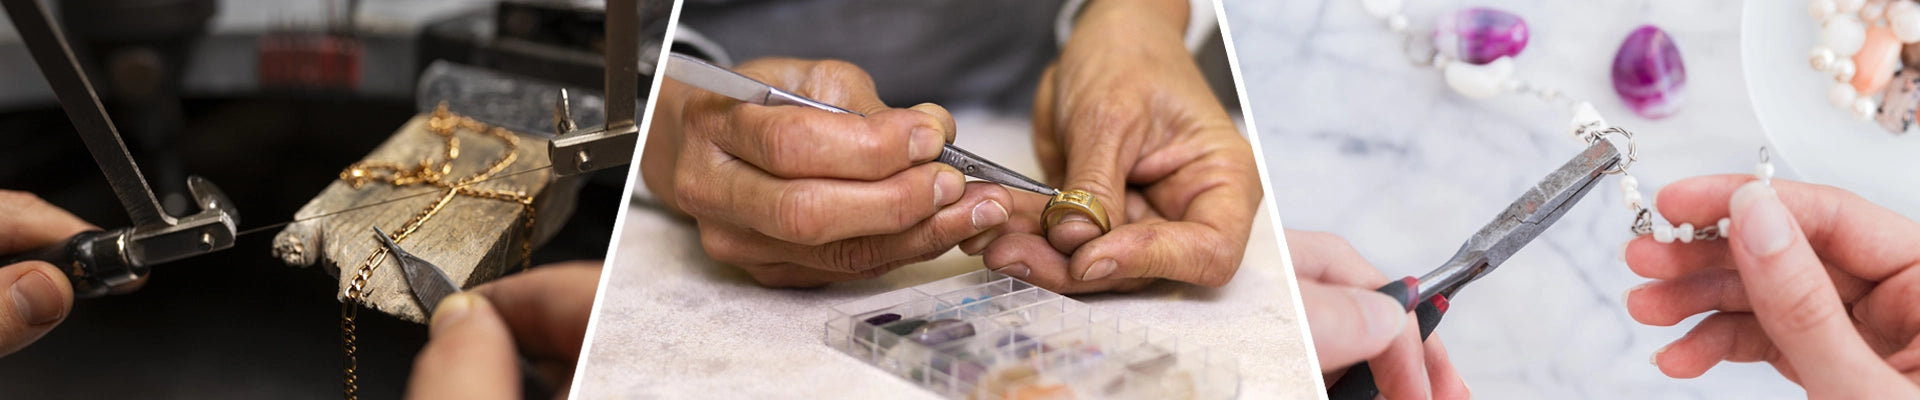
Your favorite jewelry piece is special, but it might need care over time. A broken clasp or tangled chain is common. Learning to fix these issues yourself can save you money and time.

Keeping your necklace in good shape is more than just looks. It's also about keeping its special meaning alive. With a few necklace repair tips, you can make your jewelry last longer. This way, you can enjoy it for many years.
Key Takeaways
- Learn simple techniques for fixing broken jewelry
- Understand the importance of maintaining your necklace
- Discover how to preserve the sentimental value of your jewelry
- Master DIY techniques for clasps, chains, and pendants
- Save time and money by doing it yourself
Understanding Common Necklace Issues
The first step in fixing a necklace is to know what needs fixing. This includes broken clasps and damaged chains. Knowing these problems helps you fix them well.
Signs Your Necklace Needs Repair
You might need to fix your necklace if you see certain signs. These include:
- A clasp that no longer closes securely
- A chain that is tangled beyond simple untangling
- A pendant that is loose or hanging unevenly
- Visible wear on the chain or clasp
Seeing these signs means you should act fast. This stops more damage. Regular checks can catch problems early.
Types of Necklace Damage
Necklaces can get damaged in many ways. These include:
- Broken clasps
- Frayed or broken chains
- Loose or missing gemstones
- Scratched or damaged pendants
Knowing the damage helps figure out how to fix it. For example, a broken clasp might just need a new one. But a damaged pendant might need more work.
| Type of Damage | Description | Typical Repair |
|---|---|---|
| Broken Clasp | The clasp no longer closes or is damaged. | Replace the clasp. |
| Frayed/Broken Chain | The chain is tangled, frayed, or broken. | Repair or replace the chain. |
| Loose/Missing Gemstone | A gemstone is loose or has fallen out. | Reset the gemstone. |
By knowing these common problems, you can start fixing your necklace. This keeps your jewelry looking great.
Repairing Clasps
You don't need to be a pro to fix a broken necklace clasp. With the right tools and a bit of know-how, you can do it yourself. A necklace clasp keeps your jewelry on your neck. When it breaks, fixing or replacing it is easy.
How to Fix a Broken Clasp
Fixing a broken clasp is easy if you know how. First, figure out what kind of clasp you have. You might have a lobster, toggle, or spring ring clasp. Each needs a different fix.
For a lobster clasp, see if the spring or the clasp itself is broken. If it's the spring, you might fix it by cleaning or adjusting it. But if the clasp is too far gone, you'll need a new one.
- Look closely at the clasp to find the problem.
- Clean the clasp with a soft brush and mild soap to get rid of dirt.
- If the clasp can't be fixed, get a new one.
Choosing the Right Replacement Clasp
When picking a new clasp, think about your necklace's type, weight, and style. The right clasp should be both functional and match your necklace's look. For heavy necklaces, choose a strong clasp like a toggle or a sturdy lobster clasp.
For light or old necklaces, a small clasp won't mess up the look. A spring ring or small lobster clasp might be best.
- Think about your necklace's weight and size.
- Consider the style and age of your necklace.
- Pick a clasp that goes well with your necklace's design.
By following these steps, you can fix or replace your necklace clasp. This way, your favorite piece stays wearable and keeps your memories alive.
Chain Repairs: Getting Back on Track
Don't let a broken chain ruin your favorite necklace. You can fix it at home with the right help. Chain repairs are key for necklace lovers. They save time and money, whether it's a simple fix or a bigger problem.
Identifying Chain Damage
First, find out what's wrong with your chain. Look for broken links, worn-out clasps, or tangled chains. Check your chain to see how bad it is.
Signs of chain damage include breaks, rust, and stiffness. If it's too damaged, you might need a new chain.
Simple Fixes for Chain Breaks
For simple breaks, you can use basic tools to fix your chain. Clean the area first for a smooth fix. Then, use a jump ring or chain repair link to fix the break.
Tips for a successful repair include using the right tools and working in good light. If the break is near the clasp, you might need a new clasp.
Chain Soldering Techniques
For more complex breaks or a lasting fix, try soldering. Soldering melts a metal filler into the joint, making a strong bond.
- You'll need a soldering kit for this, with a torch, solder, and flux.
- Clean the area, apply flux, and heat until the solder melts and bonds.
- Let the solder cool before touching the chain to make sure it sets right.
Restoring Pendants
Restoring pendants needs patience and the right skills. Pendants are key parts of necklaces, carrying deep meaning or value. Fixing them can be tricky, involving attaching pendants, fixing scratches, or repairing damage.
Reattaching a Pendant
Reattaching a pendant means making sure it stays on the chain or bail. You might use jump rings or fix bails. First, figure out what kind of clasp or bail it had and then fix or replace it.
Make sure the new or fixed bail is strong. Using the right tools, like pliers and wire cutters, is key for this job.
Repairing Scratched or Damaged Pendants
Fixing scratched or damaged pendants depends on their material. For metal ones, polishing can fix scratches. For big damage, like broken parts, you might need to solder or weld.
For gemstone pendants, you have to be careful not to harm the stone. Cleaning and gentle polishing are usually safe. But, for bigger repairs, you might need a pro.
Some common ways to fix pendants include:
- Polishing to remove scratches
- Soldering or welding for broken metal parts
- Reattaching or replacing bails and jump rings
- Gentle cleaning for gemstone pendants

"Restoring a pendant is not just about fixing it; it's about preserving the memories attached to it."
Fixing pendants is a detailed task that needs care and the right methods. Knowing how to attach pendants and fix damage can make your necklaces last longer.
Tools You’ll Need for Repairs
To fix necklaces well, you need the right tools. The right tools make the job easier and look professional. Whether it's fixing a clasp, mending a chain, or fixing a pendant, you need the right tools.
Essential Tools for Necklace Repair
Necklace repair can be simple or complex. Here are the tools you must have:
- Jewelry Pliers: These tools help grip, bend, and shape jewelry parts.
- Wire Cutters: Needed to cut wire or chain links to the right length.
- Magnifying Glass or Loupe: Helps see small details for precise work.
- Jewelry Adhesives: Used to bond jewelry parts together.
- Chain Nose Pliers: Great for gripping small items and making fine adjustments.
| Tool | Use |
|---|---|
| Jewelry Pliers | Gripping, bending, shaping |
| Wire Cutters | Cutting wire or chain links |
| Magnifying Glass/Loupe | Examining small details |
| Jewelry Adhesives | Bonding components |
| Chain Nose Pliers | Gripping small objects, precise adjustments |
Where to Buy Jewelry Repair Tools
Now you know what tools you need for necklace repair. Next, find where to buy them. You can get tools at local jewelry stores, online on Amazon, or at stores for jewelry makers and repair pros.
Good tools improve your necklace repair skills. They make sure your jewelry looks as good as new. With the right tools and practice, you can fix many necklace problems with confidence.
Cleaning Your Necklaces Before Repair
To get your necklace fixed right, start by cleaning it well. Cleaning your necklace before fixing it is key. It helps you see the damage clearly and makes sure repairs are done right.

Choosing the right cleaning method is as important as the solution. For delicate pieces, use a soft-bristled brush and mild soap. For intricate designs or gemstones, an ultrasonic cleaner might be best. Always check with a pro to find the best way to clean your necklace.
Best Cleaning Methods for Jewelry
Different jewelry needs different cleaning ways. Sterling silver necklaces can be cleaned with a silver cloth. Gold ones might need soap and water. For pearls or sensitive stones, a soft, dry cloth is safest.
- Use a soft-bristled brush to gently remove dirt from intricate designs.
- Avoid harsh chemicals or abrasive materials that can damage the metal or harm gemstones.
- For tough grime, consider using an ultrasonic cleaner, but ensure it's safe for your necklace's materials.
Safe Cleaning Solutions to Use
The cleaning solution must match your necklace's metal and stones. For example, a mild soap and warm water is usually safe. But always test it on a small area first.
Some safe cleaning solutions include:
- Mild dish soap mixed with warm water.
- Specialized jewelry cleaning solutions available at most jewelry stores.
- A mixture of equal parts water and white vinegar for a more natural approach.
Remember, keeping your necklaces clean and cared for is key. By following these tips, you can keep your necklaces looking great and ensure repairs are done well.
Preventive Maintenance for Necklaces
To keep your necklaces looking great, start with a proactive maintenance plan. This way, you can avoid damage and keep your jewelry shining.
Protecting Your Jewelry from Damage
Storing your necklaces right is key. Use a jewelry box or a soft pouch to stop tangling and scratches. Keep them away from sunlight and moisture to prevent fading or damage.
Be careful about when you wear your necklaces. Avoid wearing them during activities that could cause damage, like exercising or cooking. This helps prevent damage.
Regular Maintenance Tips
Regular care is important for your necklaces. Here are some tips:
- Regularly check your necklaces for wear or damage.
- Clean them gently with a soft cloth and mild soap.
- Make sure clasps and findings are secure.
- Get your necklaces professionally cleaned and maintained sometimes.
By following these tips, your necklaces will stay beautiful and last longer.
When to Seek Professional Help
Not all necklace repairs are easy to do yourself. Some need a pro jeweler's help. Simple fixes are okay, but complex ones can cause more harm if not done right.
Check if your necklace has delicate gemstones or intricate metalwork. If so, a jeweler with the right tools and skills is best. They can handle it safely and well.
Recognizing Complex Repairs
Some repairs are more than simple fixes. They might need chain soldering or stone resetting. These are best left to the pros. If you're not sure or feel unsure, it's best to get a pro's opinion.
- Damage to intricate mechanisms or complex designs
- Necklaces featuring precious or semi-precious stones that require special care
- Breaks or damage that involve intricate metalwork or engraving
For more info on when to get your jewelry fixed by a pro, check this article on 5 signs your jewelry needs professional repair.
Finding a Local Jeweler
After deciding your necklace needs a pro, find a good local jeweler. Look for ones with a good rep, experience, and happy customers. Ask friends, family, or online groups for tips.
Choose a jeweler based on their jewelry repair techniques and material skills. A good jeweler will fix your necklace and teach you how to keep it safe from future damage.

Creative Ways to Repurpose Damaged Necklaces
You don't have to throw away a broken necklace. Instead, think about making something new from it. With a bit of creativity, you can turn a broken necklace into a unique piece that shows off your style.
Transforming Broken Jewelry into New Pieces
One great way to reuse a broken necklace is to make a whole new piece. You could put the pendant on a new chain, mix parts from different necklaces, or even melt the metal to start over.
If your necklace's chain is too far gone but the pendant is still nice, try attaching it to a leather cord or a new chain. This gives your pendant a fresh start and updates your look.
Upcycling Ideas for Old Necklaces
Upcycling old necklaces means making something new and special. Here are a few ideas to start:
- Make a new bracelet or anklet from a chain.
- Use beads or charms to create a new piece of jewelry.
- Turn a pendant into a brooch or hair clip.
Let's look at some creative ways to turn your broken necklaces into stylish new pieces.
| Old Necklace Component | New Jewelry Piece | DIY Technique |
|---|---|---|
| Broken Chain | Bracelet or Anklet | Measure and cut the chain to the right length, then add a clasp. |
| Pendant | Brooch or Hair Clip | Put a brooch pin or hair clip on the back of the pendant. |
| Beads or Charms | New Necklace or Earrings | Put the beads on a new chain or wire for a new look. |
By fixing up your broken necklaces, you're not just saving money. You're also making unique jewelry that has a story. Whether you're good at DIY or just starting, making new jewelry from old is fun and rewarding.
The Importance of Proper Storage
Storing your necklaces right is easy and keeps them looking great. If not stored well, they can get tangled, scratched, or even break. Simple storage habits can make your jewelry last longer.

Tips for Storing Your Jewelry Safely
Use a jewelry box or velvet-lined case to store your necklaces. These protect against scratches and tangles. You can also use pouches or bags for each necklace to keep them organized.
Here are some additional tips for safe storage:
- Store necklaces in a cool, dry place away from direct sunlight.
- Avoid storing necklaces in humid environments, as moisture can cause damage.
- Keep necklaces away from other jewelry items that could cause scratching or tangling.
Preventing Damage While Not in Use
When your necklaces are not being worn, protect them from damage. Clean and dry them before storing. This removes dirt that could harm them over time.
As noted by jewelry experts, "Proper storage is just as important as regular cleaning and maintenance when it comes to preserving the quality of your jewelry."
"The way you store your jewelry can make all the difference in maintaining its beauty and longevity. Investing in a good jewelry box or storage case is a worthwhile investment for any jewelry owner."
By following these storage tips, your necklaces will stay in great shape, even when not worn.
Understanding Different Materials
Necklaces come in many materials, each with its own needs. Knowing these helps keep your necklace looking great for years.
Metal Types and Repair Techniques
Different metals need different fixes. For example, gold and silver necklaces can be fixed with traditional methods. But plated or filled metals need gentle care to keep the top layer safe.
Precious metals like platinum need special soldering and know-how about their high melting points. Sterling silver, on the other hand, can tarnish easily. It needs regular polishing to stay shiny.
| Metal Type | Common Repair Techniques | Special Care |
|---|---|---|
| Gold | Soldering, reshaping | Avoid harsh chemicals |
| Silver | Polishing, soldering | Regular polishing to prevent tarnish |
| Platinum | High-temperature soldering | Be mindful of the high melting point |
Caring for Gemstone-Embedded Necklaces
Gemstone necklaces need special care. Avoid harsh cleaners that can harm the stones or metal.
For diamonds and sapphires, use a soft brush and mild soap. But pearls and opals need a soft, dry cloth to avoid scratches.
By knowing your necklace's materials and how to care for them, you can enjoy it for a long time.
Seasonal Necklace Care Tips
As the seasons change, so should your necklace care. This keeps your jewelry looking great all year. Winter's dry air and summer's humidity each pose unique challenges. By adjusting your care routine, you can keep your jewelry in top shape.
Preparing Jewelry for Winter
Winter is tough on necklaces because of the cold, dry air. Here's how to get your jewelry ready for winter:
- Keep your necklaces in a cool, dry spot to stop tarnishing.
- Don't let your jewelry get too cold, as it can become brittle.
- Use a humidifier to keep humidity steady, helping prevent parts from drying out.
- Clean your necklaces before storing to keep dirt out.
Jewelry experts say winter's dry air can really wear down your jewelry. This is true for pieces with small parts or certain gemstones.
"To fight this, use an anti-tarnish strip or silica gel packets when storing. They soak up moisture and stop tarnishing."
Summer Care for Warm Weather Jewelry
Summer brings humidity and sunlight, posing new challenges. Here's how to care for your necklaces in the summer:
| Care Tip | Benefit |
|---|---|
| Keep your necklaces away from direct sunlight | Prevents fading of certain gemstones and reduces risk of overheating |
| Clean your jewelry regularly | Removes dirt and sweat that can accumulate and cause damage |
| Store your necklaces in a breathable container | Reduces the risk of moisture buildup and tarnishing |
By following these necklace maintenance tips, you can enjoy your jewelry all summer. Remember, regular care is key to preserving the beauty and longevity of your necklaces.
For more complex repairs or detailed guidance, consider consulting resources on jewelry repair techniques or seeking advice from a professional jeweler.
Testing for Strength After Repair
A necklace isn't fixed until it's tested for strength. Making sure repairs last is key. Testing the strength of your repairs gives you peace of mind. It also shows if there are any weak spots.
How to Ensure Your Repairs Are Secure
First, check the repair area carefully. Look for any signs of weakness. Gently tug on the necklace to test the clasp and chain.
For chain repairs, check the soldering. Make sure there are no weak links nearby.
Test the clasp many times. Open and close it to see if it works well. If it feels loose, you might need to replace it or fix the repair.
Tips for Wearing Your Repaired Necklace
After testing, there are ways to keep your necklace safe. Avoid wearing your necklace during activities that could cause excessive strain, like sports. Store it safely when not wearing.
- Be careful not to catch the necklace on things.
- Clean your necklace often to keep it looking good.
- Have a professional jeweler check your necklace sometimes.
Follow these tips to enjoy your necklace for a long time. Remember, caring for your necklace after repair is just as important as the repair itself.
Emotional Value of Your Jewelry
Jewelry is more than just something to wear. It keeps stories and feelings safe. Necklaces often hold memories and value that can't be found elsewhere.
When a necklace breaks, it's not just the item that's hurt. It's the memories and feelings tied to it. Fixing your jewelry helps keep these memories close to your heart.
Why Necklace Repair Is Worth It
Repairing a necklace is more than fixing a chain or clasp. It's about keeping the emotional bond you have with it. This way, you're not just fixing metal or beads. You're keeping a piece of your history safe.
Reasons to repair your necklace include:
-
- Preserving sentimental value
- Restoring the emotional connection
- Keeping memories alive
Passing down to future generations
The Stories Behind Your Necklaces
Every necklace has a story. It might be a gift, a souvenir, or a family heirloom. The stories and memories attached to these pieces make them priceless.
| Occasion | Significance | Emotional Value |
|---|---|---|
| Gift from a loved one | Symbolizes love and connection | High emotional value due to personal significance |
| Family heirloom | Represents family history and tradition | High emotional value due to historical significance |
| Souvenir | Reminds of a special memory or place | Moderate to high emotional value based on the memory's significance |
Repairing your necklaces is more than fixing them. It's about keeping the stories and memories that make them special. Whether you do it yourself or get help from a pro, the act shows how much these memories mean to you.

Resources for DIY Jewelry Repair Guidance
As you keep working on DIY jewelry repair, the right tools are key. You'll find guides to help you get better at fixing jewelry. These guides are great for both beginners and those tackling harder repairs.
Online Tutorials and Guides
There's a lot of info online, like video tutorials and step-by-step guides. Sites like YouTube and crafting forums have lots of tips. They help with fixing clasps, chains, and pendants.
Books on Jewelry Repair
If you like learning by doing, try books on jewelry repair. They offer detailed instructions and insights. This helps you feel more confident in fixing your jewelry.
Using these resources, you can keep improving and fix your necklaces well. With time and effort, you'll be able to fix many things. And you'll enjoy your jewelry for a long time.
FAQ
What are the most common issues that require necklace repair?
Issues include broken clasps, damaged chains, and scratched or loose pendants. These can be fixed with various repair techniques and tips.
How do I identify signs of wear on my necklace?
Look for fraying or breakage in the chain, loose or damaged clasps, and scratches or damage to pendants. These signs mean it's time for repair or maintenance.
Can I fix a broken clasp on my own?
Yes, you can fix a broken clasp by following step-by-step instructions. Choose the right replacement clasp to do simple repairs at home.
What are the best methods for cleaning my necklace before repair?
Use mild soap and water or specialized jewelry cleaning products for safe cleaning. Clean your necklace before repairs.
How can I prevent damage to my necklace?
Store your jewelry safely and avoid harsh chemicals. Regularly check clasps and chains for damage prevention.
When should I seek professional help for necklace repairs?
Get professional help for complex repairs like intricate chain soldering or gemstone resetting. Or when you're unsure about what to do.
Can I repurpose or upcycle a damaged necklace?
Yes, you can give a damaged necklace new life by repurposing or upcycling it. This is a creative way to fix jewelry.
How do I store my necklace to prevent damage?
Store your necklace in a safe, dry place away from sunlight and moisture. Use a jewelry box or pouch to protect it from scratches and tangling.
What are the best practices for testing necklace repairs for strength and security?
Test repairs by gently tugging on the chain or clasp. Make sure all parts are securely attached to prevent breakage.
Why is necklace repair worth the effort?
Repairing your necklace keeps its emotional value and quality. It also extends its life, making it a good investment of time and resources.
Where can I find resources for DIY jewelry repair guidance?
Find online tutorials, video guides, and books on jewelry repair. These resources can help you improve your DIY skills.