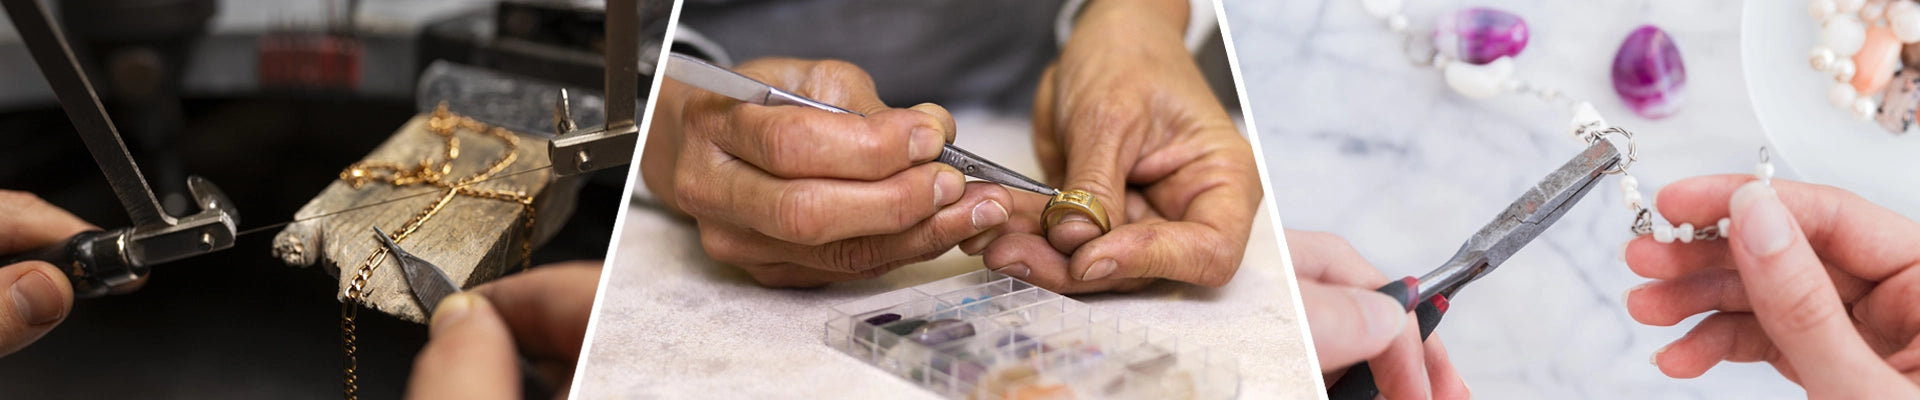
Broken or damaged jewelry can be really upsetting. It's even worse when it has special meaning. But, you don't always need a pro to fix it. With some easy DIY techniques, you can make your favorite pieces shine again.
Issues like loose stones, broken clasps, or tangled chains are easy to fix. Learning a few basic repair methods can save you money. You'll be able to breathe new life into your jewelry easily.
Key Takeaways
- Learn simple techniques to fix common jewelry issues at home.
- Understand when to attempt a DIY repair and when to seek professional help.
- Discover the basic tools needed for jewelry maintenance.
- Explore the types of jewelry repairs that can be done without professional assistance.
- Gain confidence in handling and fixing your jewelry.
Understanding Common Jewelry Problems
Before you start fixing your jewelry, it's key to know the common issues. Jewelry faces many problems from daily use, accidents, or just getting old. Spotting these problems early can stop more damage and make fixing easier.
Identifying Common Issues
Jewelry can have many common problems. These include broken chains, loose stones, and damaged clasps. Broken chains often come from wear and tear or being pulled too hard. Loose stones might be from weak prongs or impacts.
Damaged clasps can be from mechanical failure or rust. Other issues are scratches, discoloration, or warp in the metal. Scratches come from daily wear, discoloration from chemicals or aging, and warping from impacts or too much force.
Signs Your Jewelry Needs Repair
There are clear signs your jewelry needs fixing. If a stone is loose or a clasp doesn't work, it's time to fix it. Also, if a chain breaks or a ring bends, you need to fix it to avoid more damage.
Regular checks can help find these problems early. Look for rattling sounds from loose stones, trouble fastening clasps, or visible metal damage. Being proactive can make your jewelry last longer and stay beautiful.
Tools You’ll Need for DIY Repairs
Before you start fixing jewelry yourself, you need the right tools. The right tools can really help your repairs turn out well.
Essential Tools for Jewelry Repair
You'll need some basic tools for most repairs. These are:
- Pliers: Needle-nose, flat-nose, and round-nose pliers are great for many tasks.
- Jewelry wire: Having different sizes of jewelry wire is useful for repairs and adjustments.
- Wire cutters: For cutting jewelry wire or chain.
- Glue: Jewelry adhesive or epoxy is needed to hold stones or parts together.
For a full list, check out a jewelry repair tools checklist. It will help you get ready.
Optional Tools for Advanced Repairs
For harder repairs, you might need more tools. These include:
| Tool | Description | Use |
|---|---|---|
| Soldering iron | A tool for soldering metal parts. | Fixing broken clasps or chain links. |
| Jewelry mandrel | A tool for shaping and sizing rings. | Resizing rings or shaping metal. |
| Ultrasonic cleaner | A device for deep cleaning jewelry with sound waves. | Cleaning jewelry pieces deeply. |
Getting these tools will help you do easy jewelry fixes and homemade jewelry repair tricks. It will make you more confident in fixing jewelry yourself.
Fixing Broken Chains
A broken chain doesn't mean your favorite piece of jewelry is beyond repair. You can fix it at home with simple DIY techniques. Broken chains are common, but easy to fix with the right tools and knowledge.
Reconnecting Broken Links
Reconnecting broken links is a basic jewelry repair technique. It can make a broken chain new again. First, find the broken link and know your chain type.
For chains with visible connectors, use jewelry pliers to open and close the link. For complex chains, you might need a chain tool or jeweler's saw. Always work carefully to avoid more damage.
Creating New Attachments
At times, a chain is too broken, or the clasp is damaged. In these cases, creating a new attachment is a good fix. You can buy new clasps or jump rings at a craft store or online.
To attach a new clasp, open a jump ring, slide it onto the chain, and close it. For complex clasps, you might need to solder or use a clasp tool. These need skill and the right tools, but work well.
Learning to fix broken chains lets you fix jewelry at home. Whether reconnecting links or making new attachments, be patient and careful. This way, you can enjoy your jewelry for many years.
Repairing Loose Stones
A loose stone can make your jewelry look less beautiful. But, you can fix it yourself with some basic skills. Loose stones happen often because of daily wear and tear. It's important to fix them quickly to avoid more damage.

Tightening Prongs
To fix a loose stone, tighten the prongs that hold it. These prongs can wear out or bend over time. You'll need needle-nose pliers and to be gentle.
Grasp the prong with the pliers and bend it back towards the stone. Don't press too hard to avoid breaking the prong or the stone.
Tips for Tightening Prongs:
- Check the prongs before tightening to see if they're okay.
- Use a jeweler's loupe or magnifying glass for a closer look.
- Work slowly and gently to avoid more damage.
Replacing Missing Stones
If a stone is gone, you need to find a new one that looks like the old one. Look for a stone that's the same type, size, and color. Once you find it, you can use jewelry adhesive or get a professional to set it.
Considerations for Replacing Stones:
- Measure the setting to make sure the new stone fits right.
- Pick a stone that looks like the original in appearance and quality.
- If setting the stone yourself makes you nervous, get a professional jeweler.
By following these steps and tips, you can fix loose stones in your jewelry. This keeps them secure and looking great. Regular care and quick fixes are important jewelry maintenance hacks to make your pieces last longer.
Handling Broken Clasps
A broken clasp can make your favorite jewelry useless. But, there are DIY fixes. Clasps keep your jewelry on, and fixing them is easy with the right tools.
Reattaching a Broken Clasp
Fixing a broken clasp often means re-soldering it. You'll need a jeweler's torch, solder, and pliers. First, clean the area around the clasp for a strong bond. Then, use solder to fix it.
If the clasp can't be fixed, you might need a new one. For tricky repairs, be patient and careful with your jewelry. Practice on cheap items before fixing valuable ones.
Choosing the Right Replacement Clasp
Choosing the right clasp is key if you can't fix the old one. The right clasp depends on the jewelry and its use. For example, a necklace might need a toggle clasp, while a heavy chain might need a lobster claw.
- Think about the jewelry's style and material when picking a clasp.
- Make sure the new clasp fits the jewelry's design and function.
- If unsure, ask a professional jeweler for help.
By using these DIY jewelry repair tips, you can keep your jewelry in great shape. Whether fixing or replacing a clasp, be careful and detailed in your work.
Resizing Rings at Home
You can resize your ring at home without going to a jeweler. You just need the right tools and techniques. This is a key essential jewelry repair technique to make your ring fit again.
There are two main ways to resize a ring: make it bigger or smaller. Each method needs different tools and steps. If you like fixing jewelry at home, knowing how is important.
Techniques for Stretching a Ring
To enlarge a ring, you can stretch it. This method uses special tools to increase the ring's size safely. It's a careful process that needs patience and attention.
Practicing on an old ring is a good idea if you're new to do it yourself jewelry repair. It helps you learn the skills needed.
Another tool you can use is a ring mandrel. It helps you measure the ring's size accurately. This way, you can see how much it needs to be stretched.
Using Sizing Tools for Accurate Fit
To shrink a ring, sizing tools are key. Tools like sizing bars or pliers can adjust the ring's size. It's important to measure carefully for a perfect fit.
Whether stretching or sizing down, the right tools and patience are key. With practice, you'll get better at fixing jewelry at home. This skill is valuable for any jewelry owner.
Fixing Earrings
Repairing earrings is easy with the right help. Earrings are special in many jewelry collections. Fixing them can be a fun DIY project. This section will guide you through fixing broken earring hooks or missing backs.
Replacing Earring Backs
Lost or damaged earring backs are common. But, replacing them is simple. You can find new backs at jewelry stores or online. Just line it up with the post and push it in until it clicks.
For fixing broken hooks, you might need some basic tools. Learn about these tools and methods from Instructables. It has lots of easy repair tips.
Tips for Earring Repair:
- Be gentle with earrings to avoid damage.
- Store small parts like backs in a small container.
- Check your earrings often for wear.
By following these steps and tips, you can keep your earrings in top shape. Enjoy wearing them for years. Remember, a bit of care and learning to repair jewelry can make a big difference.
Cleaning and Polishing Jewelry
Bringing back your jewelry's shine is easy with a gentle clean and polish. Keeping your jewelry in top shape not only makes it look great but also lasts longer. In our jewelry restoration guide, we'll show you how to clean and polish your favorite pieces.
Effective Cleaning Solutions
A mild soap solution works well for most jewelry. Mix a few drops of mild dish soap with warm water. Soak your jewelry for a few minutes. Then, use a soft-bristled toothbrush to clean out small details.
For a deeper clean, try a jewelry cleaning solution. You can find these at jewelry stores and online.
- Mix mild dish soap with warm water.
- Soak jewelry for a few minutes.
- Gently scrub with a soft-bristled toothbrush.
- Rinse thoroughly with clean water.
Some easy jewelry fixes use things you have at home. For example, baking soda and water make a paste for cleaning silver. Just apply the paste, wait a few minutes, then rinse and dry.
Proper Techniques for Polishing
Polishing jewelry needs care to avoid damage. Use a silver polishing cloth for silver jewelry. For gold and platinum, a soft, dry cloth works well. If your jewelry has complex designs, a polishing pen or professional service might be best.
By using these homemade jewelry repair tricks regularly, you can keep your jewelry shining. Cleaning and polishing often are essential for keeping your jewelry looking new.

Repairing Bracelets
Fixing bracelets at home is easy with a few simple steps. Many people love their bracelets and want to keep them looking good. With the right tips, you can do this yourself.
Reattaching Loose Ends
Loose ends on bracelets are common. They can happen when clasps wear out or links break. To fix this, first check your bracelet to see how to best fix it. If the clasp is broken, you might need a new one. Using the right tools, like pliers and a clasp remover, helps a lot.
For broken links, you can either fix the old link or replace it. You might need to solder or crimp it, depending on the bracelet. Be careful not to damage it more.
Fixing Stretch Bracelets
Stretch bracelets can lose their stretch over time. To fix this, you need to tighten it by re-beading it. Start by taking off the old cord and remember the pattern. Then, put the beads on a new cord, making sure it's just right. A beading needle is very helpful for this.
After putting all the beads on, tie a knot to keep them in place. You can also use clear nail polish on the knot to keep it from coming undone. This trick can make your stretch bracelet look new again.
By using these DIY tips, you can fix your bracelets at home. Whether it's fixing loose ends or stretch bracelets, the right tools and techniques are key.
Working with Beaded Jewelry
Beaded jewelry repair includes many techniques. This ranges from re-stringing pearls to fixing complex designs. Knowing how to maintain and repair your jewelry can make it last longer and look great.

Re-stringing Pearls and Beads
Re-stringing is a common repair for beaded jewelry. The string or wire can weaken and break over time. You'll need basic tools like beading wire, beads or pearls, and crimp beads or knots.
First, measure the jewelry's length and cut a new wire or thread. Leave some extra for adjustments. Then, thread the beads or pearls onto the wire, making sure they're in order. Secure the ends with crimp beads or knots. For a better finish, use a beading needle to thread the wire through a small loop or clasp.
Repairing Broken Beaded Designs
Fixing broken beaded designs needs patience and detail. If a pattern is damaged, you might need to remake it. Start by looking at the jewelry to understand the original pattern. Note the bead types, colors, and their sequence.
To fix the design, remove any damaged parts. Then, rebuild the pattern with new beads that match the originals. Use beading wire or thread that matches the original for a seamless repair.
Common Beaded Jewelry Repairs
| Repair Type | Description | Tools Needed |
|---|---|---|
| Re-stringing | Replacing the wire or thread that holds beads or pearls | Beading wire/thread, beads/pearls, crimp beads/knots |
| Design Repair | Rebuilding a damaged beaded pattern | Beads, beading wire/thread, beading needle |
| Clasp Replacement | Replacing a broken clasp | New clasp, jewelry pliers |
Learning these repair techniques can keep your jewelry looking beautiful. Regular cleaning and inspections can also prevent damage. This way, you can avoid needing more extensive repairs.
Preventing Future Jewelry Damage
To keep your jewelry safe, you need to store it right, take care of it often, and use some smart tips. These steps will help you enjoy your favorite pieces for a long time.
Storing Your Jewelry Properly
Storing your jewelry well is very important. Each piece should be kept apart to stop tangling or scratching. Use a jewelry box with compartments or a soft pouch to keep things safe. For special or valuable items, check out jewelry repair guides for more storage tips.
Regular Maintenance Tips
Keeping your jewelry in good shape needs regular care. Clean it often with the right solutions and check for wear signs. For complex items, get help from a pro. Simple DIY jewelry repair tips can also help keep your jewelry looking great and lasting longer.
- Clean your jewelry regularly
- Inspect for signs of wear
- Store pieces separately
By following these easy tips, you can greatly lower the chance of damage to your jewelry. For more detailed advice on fixing and restoring jewelry, look at a full jewelry restoration guide.
Creative Solutions for Jewelry Upgrades
Give your old jewelry a new life with creative upgrades. You can turn old, broken pieces into something new and cool. This shows off your personal style.
Transforming Old Jewelry into New Designs
Upgrading your jewelry by changing old pieces into new ones is rewarding. It keeps the sentimental value but makes it modern. For example, you can change a necklace into earrings or a ring.
First, collect your old jewelry and check its condition. Look for interesting parts like unique gemstones or detailed designs. Think about how you can use these parts in a new way. You can find ideas online or in books, or sketch your ideas.

Adding Personal Touches to Your Pieces
Adding personal touches makes your jewelry special and meaningful. You can use birthstones, engravings, or custom designs that show your personality. For instance, add a charm to a bracelet or necklace that means something to you.
Some ideas for personalizing include:
- Engraving initials or special dates on pendants or rings
- Adding birthstones or other significant gemstones to your jewelry
- Creating custom charms or pendants that reflect your interests or passions
- Using different materials or textures to give your jewelry a unique feel
For more ideas and help on jewelry repair and upgrades, visit https://www.lamasters.com/jewelry-repair-guide. It has a detailed guide on DIY jewelry repair methods.
Knowing When to Seek Professional Help
Not every jewelry problem can be fixed at home. Sometimes, you need a pro for how to repair jewelry. Trying to fix it yourself can cause more harm or make it unfixable.
Recognizing Irreparable Damage
Some jewelry damage is too big for DIY fixes. For example, fancy antique pieces or items with tricky parts need special tools and skills. If your delicate or historically significant piece is damaged, get help right away.
Here are signs your jewelry needs a pro:
- Significant structural damage
- Missing or broken parts that are key to the piece's shape
- Complex mechanisms or antique designs
For more info on when to get your jewelry fixed, check out Portsmouth Jewelers for expert advice.
Benefits of Professional Repair Services
Professional jewelers can fix your jewelry like new. They also give tips on jewelry maintenance hacks to avoid future problems.
| Benefit | Description |
|---|---|
| Expertise | Professional jewelers know how to fix complex issues. |
| Quality Restoration | They make sure your jewelry is fixed right, keeping its value and look. |
| Preventive Advice | Professionals share easy jewelry fixes and care tips to keep your jewelry looking good longer. |
Knowing when to get professional help means your jewelry gets the care it needs. This keeps it beautiful and lasting longer.
Embracing Your Skills in Jewelry Repair
Learning diy jewelry repair tips and techniques boosts your confidence. You'll be able to fix your favorite pieces. This includes fixing broken chains and reattaching loose stones.
Building Confidence
Using homemade jewelry repair tricks makes you feel proud of your work. The more you practice, the better you get. You can find more tips and techniques on Motek.
DIY Creativity
DIY jewelry repair lets you show your creativity. You can turn old or damaged pieces into something unique. As you get better, you'll find new ways to make your jewelry special.
FAQ
What are the most common jewelry problems that can be fixed at home?
You can fix broken chains, loose stones, and broken clasps at home. Just use the right tools and techniques.
How do I know if my jewelry needs repair?
Check for loose stones, broken clasps, or worn-out parts. Fix these issues quickly to avoid more damage.
What are the essential tools for DIY jewelry repair?
You'll need pliers, wire cutters, and a jeweler's loupe. These tools help with basic repairs like fixing chains and tightening stones.
Can I resize my ring at home?
Yes, you can resize a ring at home. Use stretching or sizing tools, but be careful not to damage the ring.
How do I clean and polish my jewelry effectively?
Clean with mild soap and water. Use a soft cloth for polishing. This keeps your jewelry shiny and in good condition.
What are some tips for preventing future jewelry damage?
Store jewelry in a cool, dry place. Clean and inspect it regularly. This helps prevent damage.
Can I transform old jewelry into new designs?
Yes, you can give old jewelry a new look. Try new designs or add personal touches. It's a fun way to update your collection.
When should I seek professional help for jewelry repair?
If you're not sure how to fix something or if the damage is big, get a professional. A qualified jeweler can do a proper repair.
How can I build confidence in my jewelry repair skills?
Start with simple repairs and practice often. Be patient as you get better. You'll become more confident in fixing jewelry at home.
What are some DIY jewelry repair techniques for beaded jewelry?
You can re-string pearls and beads, and fix broken beaded designs. With practice, you can master these skills.